
内容一:判断 Linux 是 BIOS 还是 EFI 的方法
# ls -ld /sys/firmware/efi(补充:如果 /sys/firmware/efi 目录存在,则代表系统是 EFI,否则系统是 BIOS)
内容二:判断 Linux 是 BIOS 还是 EFI 的脚本
# [ -d /sys/firmware/efi ] && echo UEFI || echo BIOS# ls -ld /sys/firmware/efi(补充:如果 /sys/firmware/efi 目录存在,则代表系统是 EFI,否则系统是 BIOS)
# [ -d /sys/firmware/efi ] && echo UEFI || echo BIOS# rm <file># rm -r <directory># rm -rf <directory># rm -rf .#*# rm -rf *txt(补充:这里以非交互式删除所有以 txt 作为后缀名称的文件为例)
作者:朱明宇
名称:自动化部署 GRUB2 Bootloader 密码(openSUSE&SUSE 版)
作用:自动化部署 GRUB2 Bootloader 密码(openSUSE&SUSE 版)

使用方法:
1. 给此脚本添加执行权限
2. 执行此脚本
3. 当启动系统时,左下角出现以下内容时按下 “E”:
C: Command Line    E: Edit Entry

注意:
1. 登陆的账号是 root
2. 登陆的密码是 eternalcenter#!/bin/bash
echo "#!/bin/sh
exec tail -n +3 \$0
# This file provides an easy way to add custom menu entries. Simply type the
# menu entries you want to add after this comment. Be careful not to change
# the 'exec tail' line above.
set superusers=\"root\"
password_pbkdf2 root grub.pbkdf2.sha512.10000.B857B79D02FF55CA3A69B8485C1A4A427424630C804CC8A89134520A34E056D7882A778F6BC8AD856CB95DF8B99BE25F9FEAD899D826BB3915FB20BAD682D10A.4A1CF49B7F815A0578031CCA2CE98C66BDFBEAB0AE2721531BB54AFC6CFFA990FBD9062F41C006376C283B717FEC1BD9BB1AFB882AF91B5F4A812459D7974D1F
export superusers
set unrestricted_menu=\"y\"
export unrestricted_menu" > /etc/grub.d/40_custom
grep "rd.shell=0" /etc/default/grub
if [ $? -ne 0 ];then
sed -i '/GRUB_CMDLINE_LINUX_DEFAULT="/s/"$/ rd.shell=0"/' /etc/default/grub
fi
grep "showopts" /etc/default/grub
if [ $? -ne 0 ];then
sed -i '/GRUB_CMDLINE_LINUX_DEFAULT="/s/"$/ showopts"/' /etc/default/grub
fi
grep "LANG=C" /etc/default/grub
if [ $? -ne 0 ];then
sed -i '/GRUB_CMDLINE_LINUX_DEFAULT="/s/"$/ LANG=C"/' /etc/default/grub
fi
grub2-mkconfig -o /boot/grub2/grub.cfg在创建 KVM 虚拟机之前要先安装 KVM 并创建 KVM 虚拟网络
在 openSUSE 官网上下载安装系统所需要的镜像:
https://software.opensuse.org/distributions/leap
主要用于批量克隆出新的 KVM 机器,节约创建新虚拟机的时间
(只在真机上执行以下步骤)
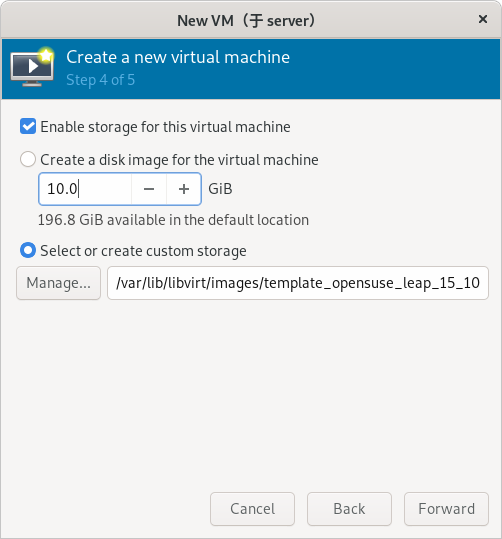
# qemu-img create -f qcow2 /var/lib/libvirt/images/template_opensuse_leap_15_10g.qcow2 10G(只在真机上执行以下步骤)
# ls /var/lib/libvirt/images/ | grep template_opensuse_leap_15_10g.qcow2(只在真机上执行以下步骤)
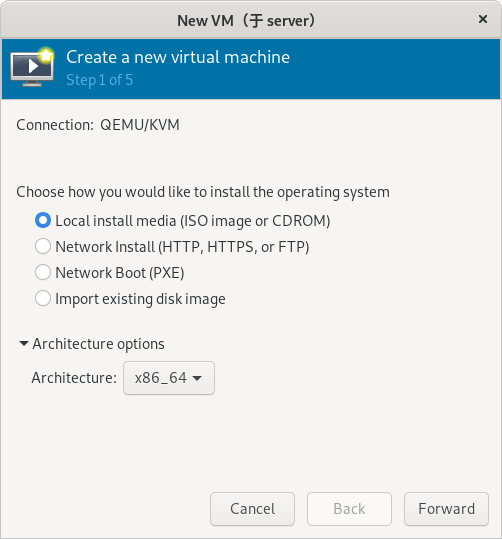
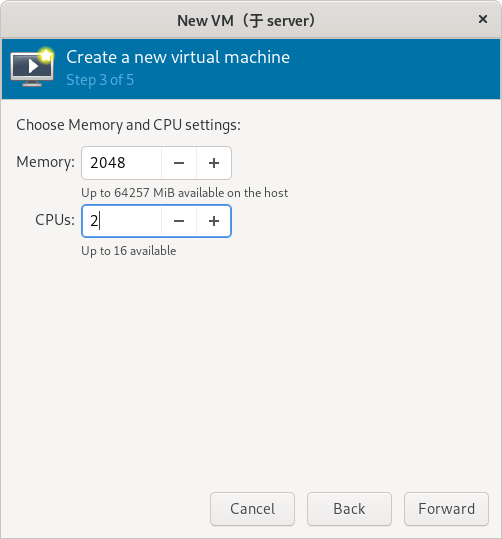
# virt-manager(只在真机上执行以下步骤)
(步骤略)
(只在真机上执行以下步骤)
(只在真机上执行以下步骤)

(只在真机上执行以下步骤)
(只在真机上执行以下步骤)
(只在真机上执行以下步骤)
(注意:虚拟网络必须提前创建好)
(只在真机上执行以下步骤)
(只在真机上执行以下步骤)

(只在真机上执行以下步骤)
(只在真机上执行以下步骤)
(只在真机上执行以下步骤)
(只在真机上执行以下步骤)
(只在真机上执行以下步骤)
(只在真机上执行以下步骤)

(只在真机上执行以下步骤)
(只在真机上执行以下步骤)

(只在真机上执行以下步骤)
(只在真机上执行以下步骤)
(只在真机上执行以下步骤)

(只在真机上执行以下步骤)
(只在真机上执行以下步骤)

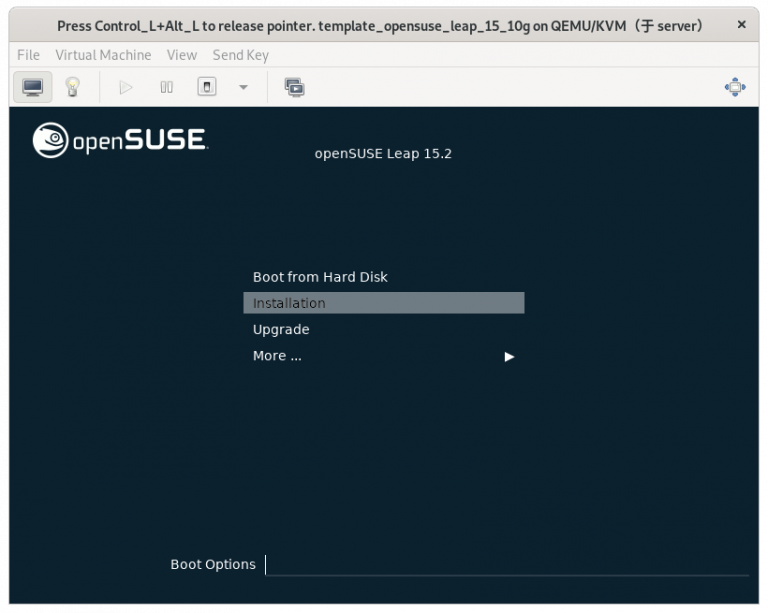
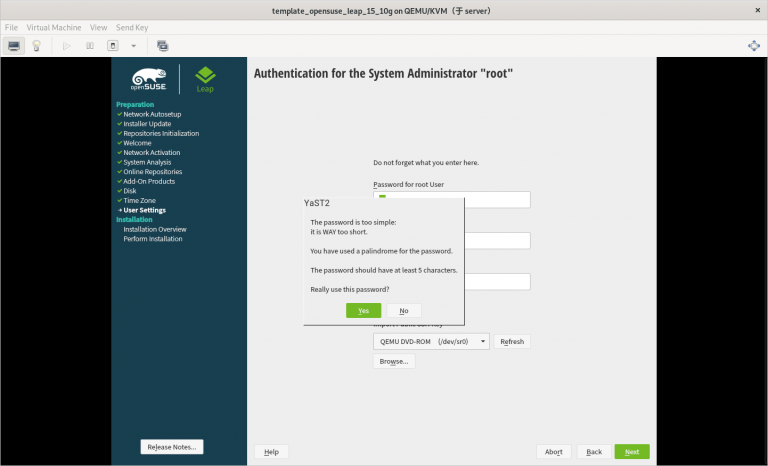
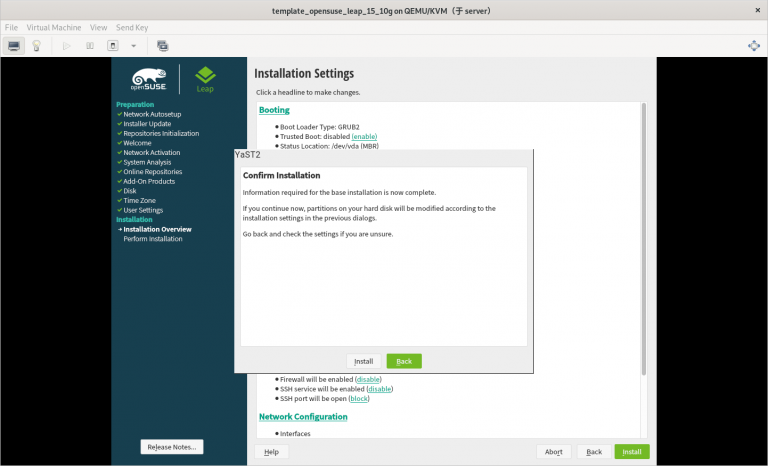
3.2.21 在安装系统的过程中需要注意的内容总结
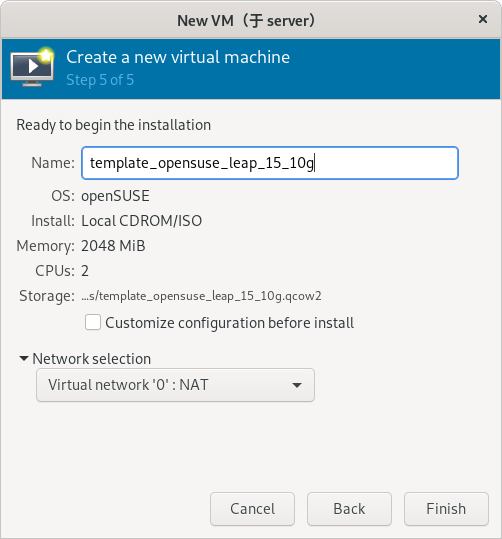
1) 一定要使用刚刚创建的 template_opensuse_leap_15_10g.qcow2 作为安装虚拟机的硬件文件
2) 虚拟机网络 “0” 要提前创建好
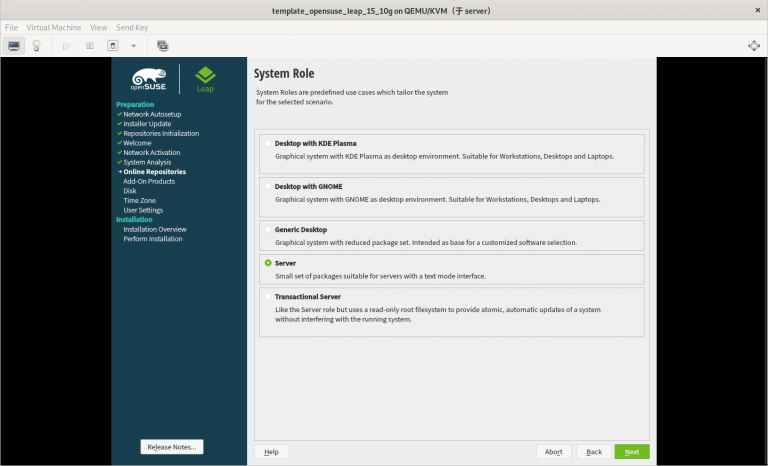
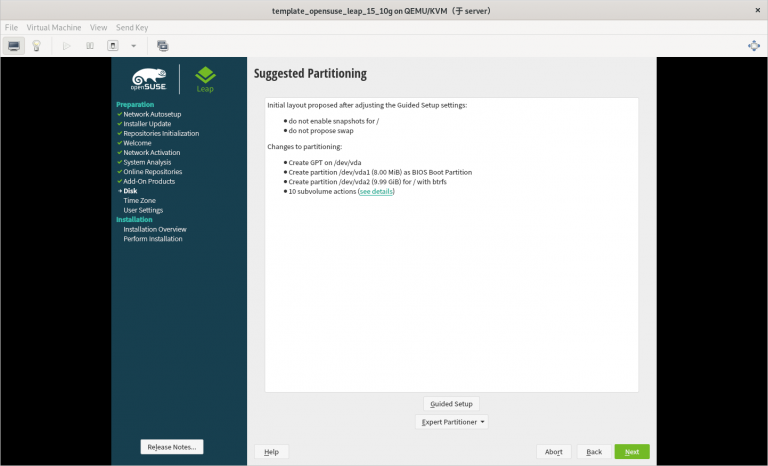
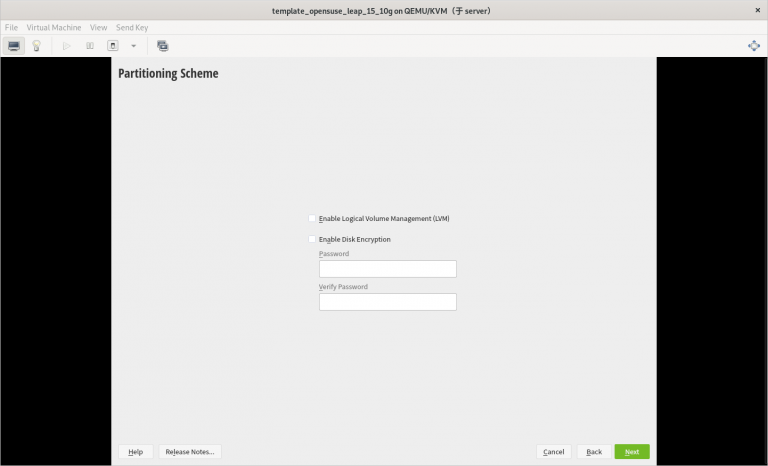
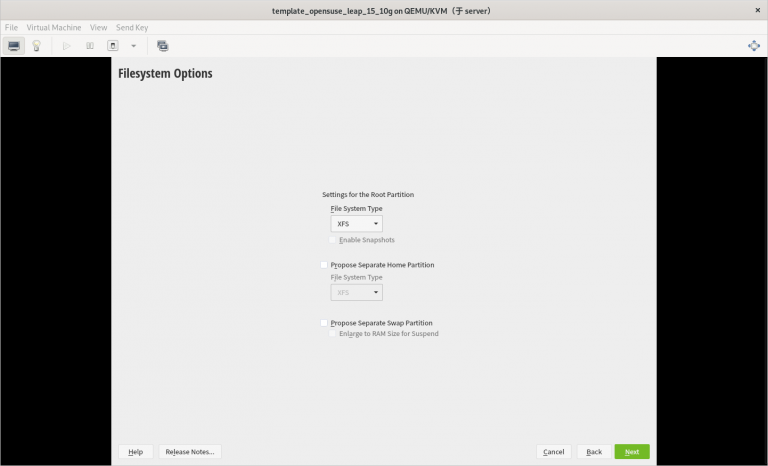
3) 只分一个分区,只设置一个挂载点挂载到根,使用标准硬盘,硬盘格式是 XFS
4) 选择最小化安装系统步骤四:进入新创建虚拟机修改配置
(只在虚拟机上执行以下步骤)
4.1 添加 Console 配置
4.1.1 修改 grub 内核配置文件
# vi /etc/default/grub
将全部内容修改如下:
# If you change this file, run 'grub2-mkconfig -o /boot/grub2/grub.cfg' afterwards to update
# /boot/grub2/grub.cfg.

# Uncomment to set your own custom distributor. If you leave it unset or empty, the default
# policy is to determine the value from /etc/os-release
GRUB_DISTRIBUTOR=
GRUB_DEFAULT=saved
GRUB_HIDDEN_TIMEOUT=0
GRUB_HIDDEN_TIMEOUT_QUIET=true
GRUB_TIMEOUT=8
GRUB_CMDLINE_LINUX_DEFAULT="splash=silent mitigations=auto quiet"
GRUB_SERIAL_COMMAND="serial --unit=1 --speed=115200"
GRUB_CMDLINE_LINUX="biosdevname=0 net.ifnames=0 console=tty0 console=ttyS0,115200n8"
GRUB_DISABLE_LINUX_UUID="true"
GRUB_ENABLE_LINUX_LABEL="true"
GRUB_DISABLE_RECOVERY="true"

# Uncomment to automatically save last booted menu entry in GRUB2 environment

# variable `saved_entry'
# GRUB_SAVEDEFAULT="true"
#Uncomment to enable BadRAM filtering, modify to suit your needs

# This works with Linux (no patch required) and with any kernel that obtains
# the memory map information from GRUB (GNU Mach, kernel of FreeBSD ...)
# GRUB_BADRAM="0x01234567,0xfefefefe,0x89abcdef,0xefefefef"
#Uncomment to disable graphical terminal (grub-pc only)

GRUB_TERMINAL="gfxterm"
# The resolution used on graphical terminal
#note that you can use only modes which your graphic card supports via VBE

# you can see them in real GRUB with the command `vbeinfo'
GRUB_GFXMODE="auto"
# Uncomment if you don't want GRUB to pass "root=UUID=xxx" parameter to Linux
# GRUB_DISABLE_LINUX_UUID=true
#Uncomment to disable generation of recovery mode menu entries

# GRUB_DISABLE_RECOVERY="true"
#Uncomment to get a beep at grub start

# GRUB_INIT_TUNE="480 440 1"
GRUB_BACKGROUND=
GRUB_THEME=/boot/grub2/themes/openSUSE/theme.txt
SUSE_BTRFS_SNAPSHOT_BOOTING="true"
GRUB_DISABLE_OS_PROBER="false"
GRUB_ENABLE_CRYPTODISK="n"
GRUB_CMDLINE_XEN_DEFAULT="vga=gfx-1024x768x16"
4.1.2 使修改的 grub 内核配置生效
# grub2-mkconfig -o grub
4.2 将系统自动挂载的硬盘从使用 uuid 换成硬件路径
4.2.1 查看根分区的 UUID
# blkid
/dev/vda1: UUID="53ee2f87-89b8-4cd7-a4dc-0957d28f4831" TYPE="xfs" PARTUUID="3d8377ef-01"
(补充:这里的 UUID 是: 53ee2f87-89b8-4cd7-a4dc-0957d28f4831)
4.2.2 在自动挂载文件里将根分区的 UUID 换成硬件路径
# vi /etc/fstab
将以下内容:
......
UUID=53ee2f87-89b8-4cd7-a4dc-0957d28f4831 /                   xfs     defaults        0 0
(补充:这里的 UUID 是: 53ee2f87-89b8-4cd7-a4dc-0957d28f4831)
修改为:
/dev/vda1 / xfs defaults 0 0
4.3 删除不用的软件
# zypper -n rm firewalld-*
4.4 进行分区扩展
4.4.1 安装分区扩展软件
# zypper -n in growpart
4.4.2 给开机自启配置文件相应的权限
# chmod 755 /root/growpart.sh
4.4.3 设置开机自动扩容根目录
4.4.3.1 让 systemctl 管理 /root/growpart.sh 脚本
4.4.3.1.1 创建 systemctl 管理 /root/growpart.sh 脚本的配置文件
# vim /etc/systemd/system/growpart.service
创建以下内容:
[Unit]
Description=growpart
After=default.target
[Service]
Type=oneshot
ExecStart=/root/growpart.sh
[Install]
WantedBy=default.target
4.4.3.1.2 让 systemctl 管理 /root/growpart.sh 脚本
# systemctl daemon-reload
4.4.3.2 设置开机自动扩容根目录
# systemctl enable --now growpart.service
4.5 只使用本地软件源(选做)
4.5.1 禁用所有软件源(选做)
# zypper mr -da
4.5.2 添加本地软件源(选做)
# zypper ar -fcg http://10.0.0.254/openSUSE-Leap-15/ lan
(注意: http://10.0.0.254/openSUSE-Leap-15/ 需要根据真实环境的情况进行更改)
4.5.3 添加本地软件源(选做)
# zypper ref
4.6 修改虚拟机系统的名称
# hostnamectl set-hostname template_opensuse_leap_15_10g
4.7 启用 serial 服务实现通过 virsh console 命令控制虚拟机
# systemctl start serial-getty@ttyS0
# systemctl enable serial-getty@ttyS0
4.8 清除虚拟系统的历史命令
# history -c
4.9 关闭虚拟机
# poweroff
步骤五:此时就可以将此虚拟机的硬件文件作为模板进行批量克隆虚拟机了
(只在真机上执行以下步骤)(只在真机上执行以下步骤)
1) 一定要使用刚刚创建的 template_opensuse_leap_15_10g.qcow2 作为安装虚拟机的硬件文件
2) 虚拟机网络 “0” 要提前创建好
3) 只分一个分区,只设置一个挂载点挂载到根,使用标准硬盘,硬盘格式是 XFS
4) 选择最小化安装系统
(只在虚拟机上执行以下步骤)
# vi /etc/default/grub将全部内容修改如下:
# If you change this file, run 'grub2-mkconfig -o /boot/grub2/grub.cfg' afterwards to update
# /boot/grub2/grub.cfg.
# Uncomment to set your own custom distributor. If you leave it unset or empty, the default
# policy is to determine the value from /etc/os-release
GRUB_DISTRIBUTOR=
GRUB_DEFAULT=saved
GRUB_HIDDEN_TIMEOUT=0
GRUB_HIDDEN_TIMEOUT_QUIET=true
GRUB_TIMEOUT=8
GRUB_CMDLINE_LINUX_DEFAULT="splash=silent mitigations=auto quiet"
GRUB_SERIAL_COMMAND="serial --unit=1 --speed=115200"
GRUB_CMDLINE_LINUX="biosdevname=0 net.ifnames=0 console=tty0 console=ttyS0,115200n8"
GRUB_DISABLE_LINUX_UUID="true"
GRUB_ENABLE_LINUX_LABEL="true"
GRUB_DISABLE_RECOVERY="true"
# Uncomment to automatically save last booted menu entry in GRUB2 environment
# variable `saved_entry'
# GRUB_SAVEDEFAULT="true"
#Uncomment to enable BadRAM filtering, modify to suit your needs
# This works with Linux (no patch required) and with any kernel that obtains
# the memory map information from GRUB (GNU Mach, kernel of FreeBSD ...)
# GRUB_BADRAM="0x01234567,0xfefefefe,0x89abcdef,0xefefefef"
#Uncomment to disable graphical terminal (grub-pc only)
GRUB_TERMINAL="gfxterm"
# The resolution used on graphical terminal
#note that you can use only modes which your graphic card supports via VBE
# you can see them in real GRUB with the command `vbeinfo'
GRUB_GFXMODE="auto"
# Uncomment if you don't want GRUB to pass "root=UUID=xxx" parameter to Linux
# GRUB_DISABLE_LINUX_UUID=true
#Uncomment to disable generation of recovery mode menu entries
# GRUB_DISABLE_RECOVERY="true"
#Uncomment to get a beep at grub start
# GRUB_INIT_TUNE="480 440 1"
GRUB_BACKGROUND=
GRUB_THEME=/boot/grub2/themes/openSUSE/theme.txt
SUSE_BTRFS_SNAPSHOT_BOOTING="true"
GRUB_DISABLE_OS_PROBER="false"
GRUB_ENABLE_CRYPTODISK="n"
GRUB_CMDLINE_XEN_DEFAULT="vga=gfx-1024x768x16"(只在虚拟机上执行以下步骤)
# grub2-mkconfig -o grub(只在虚拟机上执行以下步骤)
# blkid
/dev/vda1: UUID="53ee2f87-89b8-4cd7-a4dc-0957d28f4831" TYPE="xfs" PARTUUID="3d8377ef-01"(补充:这里的 UUID 是: 53ee2f87-89b8-4cd7-a4dc-0957d28f4831)
(只在虚拟机上执行以下步骤)
# vi /etc/fstab将以下内容:
......
UUID=53ee2f87-89b8-4cd7-a4dc-0957d28f4831 / xfs defaults 0 0(补充:这里的 UUID 是: 53ee2f87-89b8-4cd7-a4dc-0957d28f4831)
修改为:
......
/dev/vda1 / xfs defaults 0 0(只在虚拟机上执行以下步骤)
# zypper -n rm firewalld-*(只在虚拟机上执行以下步骤)
# zypper -n in growpart(只在虚拟机上执行以下步骤)
# chmod 755 /root/growpart.sh(只在虚拟机上执行以下步骤)
# vim /etc/systemd/system/growpart.service创建以下内容:
[Unit]
Description=growpart
After=default.target

[Service]
Type=oneshot
ExecStart=/root/growpart.sh

[Install]
WantedBy=default.target(只在虚拟机上执行以下步骤)
# systemctl daemon-reload(只在虚拟机上执行以下步骤)
# systemctl enable --now growpart.service(只在虚拟机上执行以下步骤)
# zypper mr -da(只在虚拟机上执行以下步骤)
# zypper ar -fcg http://10.0.0.254/openSUSE-Leap-15/ lan(注意: http://10.0.0.254/openSUSE-Leap-15/ 需要根据真实环境的情况进行更改)
(只在虚拟机上执行以下步骤)
# zypper ref(只在虚拟机上执行以下步骤)
# hostnamectl set-hostname template_opensuse_leap_15_10g(只在虚拟机上执行以下步骤)
# systemctl start serial-getty@ttyS0
# systemctl enable serial-getty@ttyS0(只在虚拟机上执行以下步骤)
# history -c(只在虚拟机上执行以下步骤)
# poweroff(只在真机上执行以下步骤)
作者:朱明宇
名称:批量设置官方软件源(openSUSE 版)
作用:批量设置官方软件源(openSUSE 版)
使用方法:
1. 服务器清单 $add_repo_servers_list.txt 每一个服务器名占用一行,并和此脚本放在同一目录下
2. 在此脚本的分割线内写入相应的内容
3. 给此脚本添加执行权限
4. 执行此脚本
脚本分割线里的变量:
add_repo_servers_list.txt #指定存放要设置官方软件源的文件
注意:
1. 此脚本执行前必须要先保证执行此脚本的用户能无密码 ssh 远程这些远程服务器
2. 服务器的系统需要是 openSUSE 15.2 版本
3. 服务器系统要配置好可用的软件源(最好是软件数量最多的官方版本)
4. 这些远程服务器要能够连接外网
#!/bin/bash

####################### Separator ########################

add_repo_servers_list.txt

####################### Separator ########################

cat add_repo_servers_list.txt
read -p "will add opensuse_leap_15.2 repo please input y " a
echo $a

if [ "$a" != "y" ];then
        echo "you don't agree so exit now"
        exit
fi

for i in `awk '{print $1}' add_repo_servers_list.txt`
do
        ssh $i '
        sudo -u root su - root -c "zypper mr -da"
        sudo -u root su - root -c "zypper ar -fcg http://download.opensuse.org/distribution/leap/15.2/repo/oss/ OpenSUSE_Leap_152_x64_update-oss"
        sudo -u root su - root -c "zypper ar -fcg http://download.opensuse.org/distribution/leap/15.2/repo/non-oss/ OpenSUSE_Leap_152_x64_update-non-oss"
        sudo -u root su - root -c "zypper ar -fcg http://download.opensuse.org/update/leap/15.2/oss/ OpenSUSE_Leap_152_x64_oss"
        sudo -u root su - root -c "zypper ar -fcg http://download.opensuse.org/update/leap/15.2/non-oss/ OpenSUSE_Leap_152_x64_non-oss"
        sudo -u root su - root -c "zypper ref"
done